

Google Analytics 4, or GA4, is Google’s latest tool for tracking how people use your website or app. It shows what visitors do—like which pages they visit, how long they stay, or if they click a button. GA4 works across different devices, so you can see how someone moves from phone to laptop. It’s different from the older version because it focuses more on what people actually do, not just page views.
You can set it up with a Google account and a small bit of code on your site. Once it's running, you’ll start seeing clear reports that help you understand what’s going on with your traffic, without guessing. It’s simple, free, and smart to use. Let’s find out more in our GA4 guide.

How to Set Up Google Analytics 4 the Right Way – Even If You’re a Beginner
If you’ve just heard about Google Analytics 4 (GA4) and feel a bit lost, don’t worry—you’re not alone. GA4 is the new version of Google Analytics. It’s built to track what people do on your website or app. It might look confusing at first, but once you get it running, you’ll be glad you did. This GA4 tutorial will walk you through everything step by step. No need to know fancy tech stuff. Just follow along, and you’ll get it set up properly. If you’re unsure, try outsourcing SEO services for the best result!
Step 1: Create a Google Analytics Account (If You Don’t Have One)
To start GA4 configuration, you need a Google account. If you use Gmail, you already have one. If not, create one here. Once logged in, go to the Google Analytics homepage. Click on the button that says “Start measuring.”
Now you’ll see a form asking for basic details:
- Account name: You can name it after your business or website.
- Data sharing settings: You can leave these as they are or turn off the ones you don’t like.
The account name isn’t too important. Just pick something easy to remember.

Step 2: Set Up a Property for GA4
After creating a new Google Analytics account, you’ll set up a “property.” This is where GA4 collects the information from your website. Here’s how to do it:
- Enter a property name (like “My Website” or “Store Tracker”).
- Choose your time zone and currency.
- Click Next.
- Google will ask about your business size and how you plan to use Analytics. Just choose what fits. Or you can skip it.
- Finally, click Create. You’ll need to accept the Terms of Service.
Once that’s done, you’ll enter your new GA4 dashboard. If you already have the old version of Analytics (called Universal Analytics), GA4 doesn’t replace it automatically. It runs separately.


Step 3: Add a Data Stream (Your Website or App)
Now, it’s time to tell GA4 configuration where the information should come from. In most cases, you’ll want to track a website. Here’s what to do:
- Click “Web” when asked to choose between Web, Android, or iOS.
- Type in your website’s URL (e.g., www.example.com)
- Give it a name like “Main Site” or “Homepage Tracker.”
- Click Create Stream.
GA4 will now show a page with your Measurement ID. It looks something like: G-ABC1234567. Keep this ID handy. You’ll need it in the next step.


Step 4: Add the GA4 Code to Your Website
This part connects your website to GA4. It tells your site to start sending info. There are a few ways to do it, depending on your website platform.
If You Use WordPress:
Use a plugin like Site Kit by Google.
- Install it in your WordPress dashboard.
- Connect it to your Google account.
- Choose your GA4 property.
- Site Kit will add the code for you.

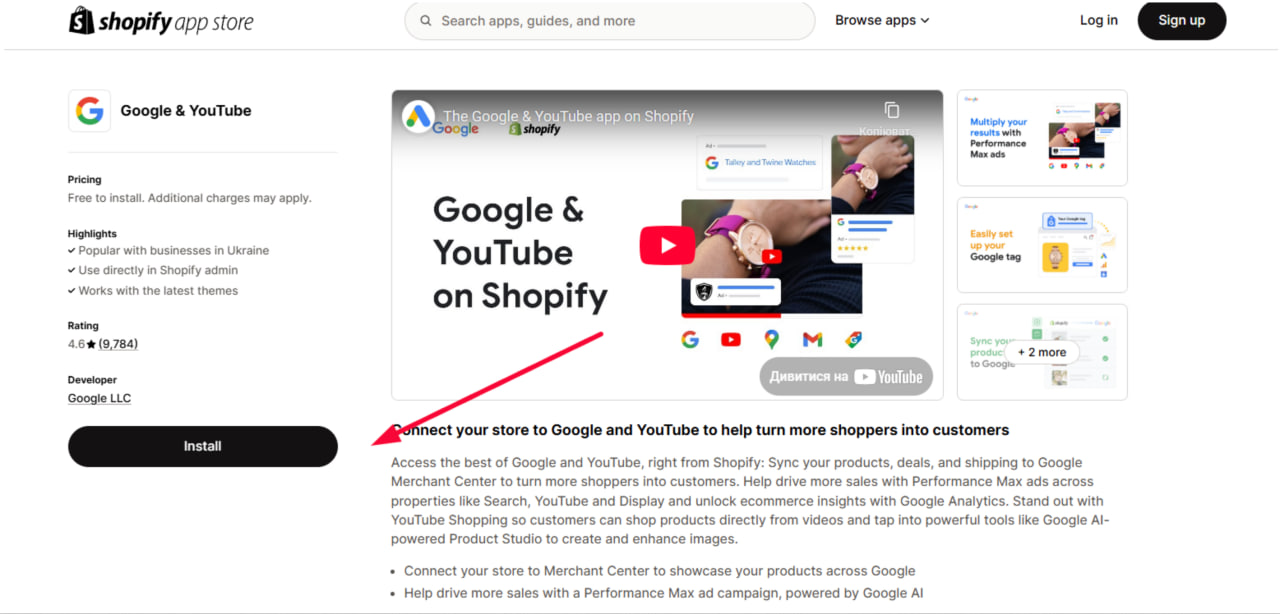
If You Use Shopify:
You can’t directly add GA4 yet (Shopify still supports the old version), but you can use the Google Channel App. Or, follow these steps: GA4 and Shopify Setup Guide.
If You Built Your Own Site (HTML or Developer Help):
- Copy the code under “Tagging Instructions” from your data stream page.
- Paste it before the closing </head> tag on every page you want to track.
If you’re not sure where to paste the code, ask your web developer or someone who built your site.

Step 5: Test If It’s Working
Once the code is in place, test if GA4 is collecting anything.
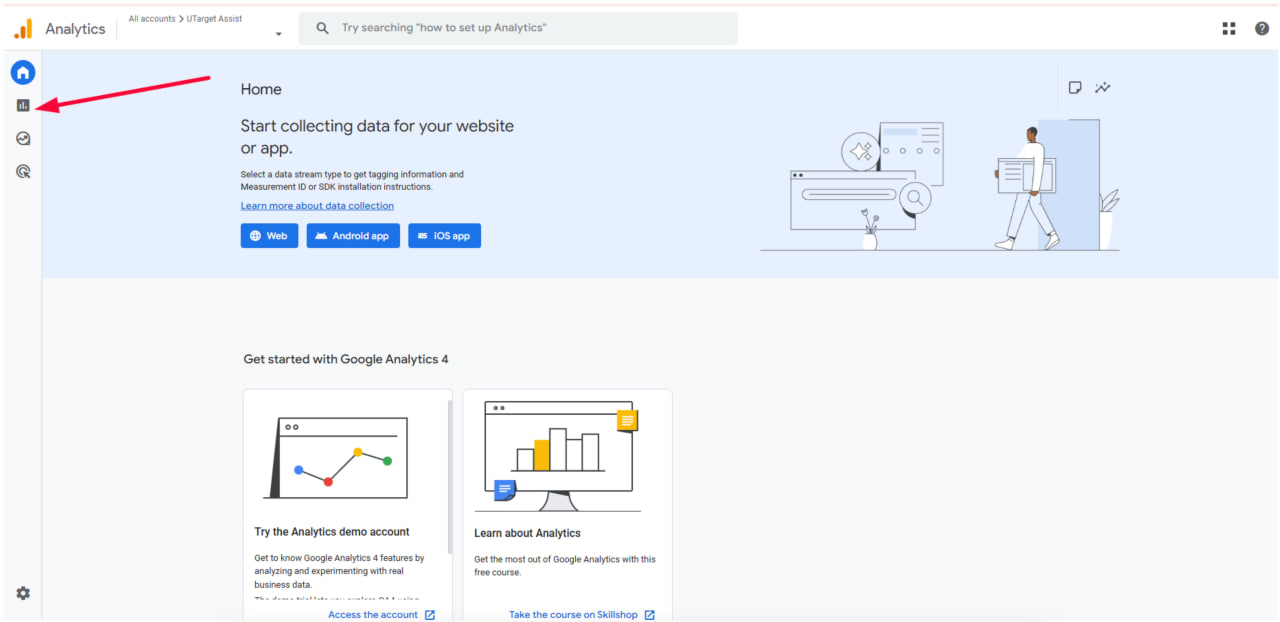
- Go back to your GA4 dashboard.
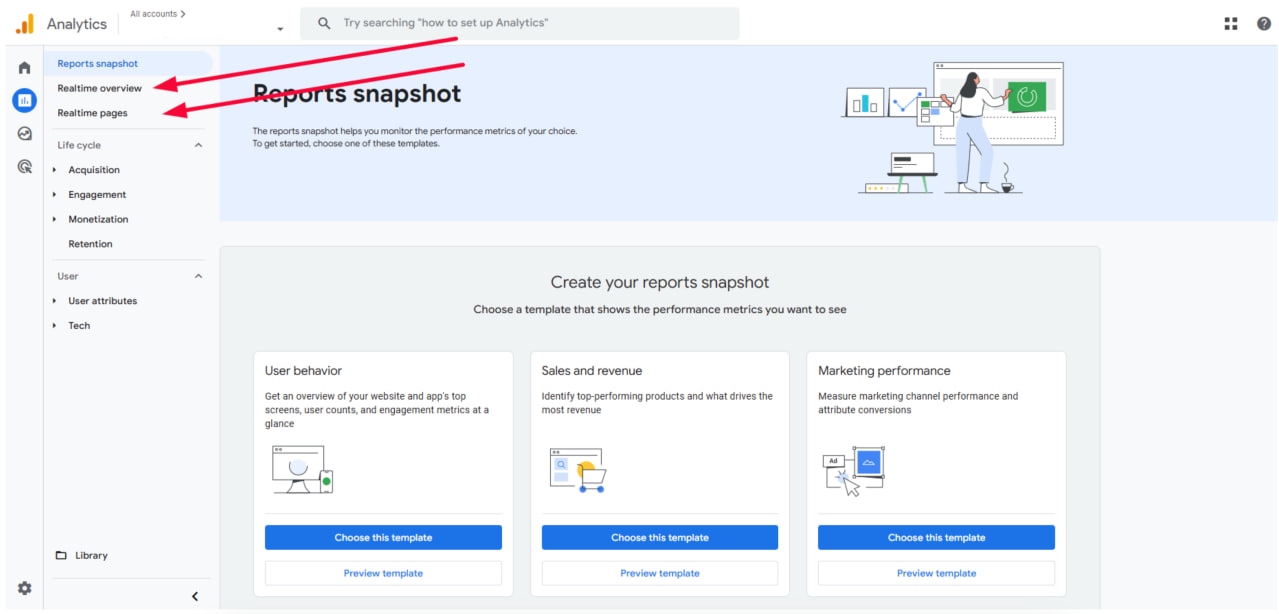
- Click “Reports” > “Realtime”.
Now open your website in a new tab or phone. You should see at least 1 active user. That’s you!
If nothing shows up:
- Double-check the code was added correctly.
- Try waiting 10–15 minutes.
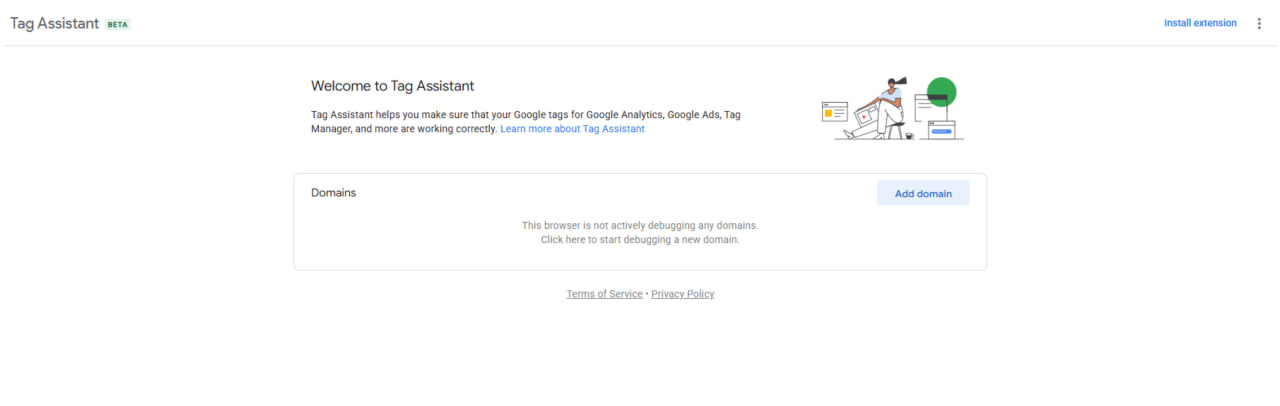
- Or use Google’s Tag Assistant to check your tag.
Always test after you set it up. Sometimes, a small mistake (like a missing tag) can break tracking.
Step 6: Set Up Events
GA4 tracks things differently from the old version. It focuses on actions—called “events.” Some events are automatic (like page views), but you can add custom ones.
Automatic events include:
- Page views
- Scrolls
- Clicks
- Site search
- Video engagement
To turn these on:
- Go to Admin > Data Streams > Click your stream.
- Make sure “Enhanced Measurement” is switched ON.

To add your own events:
Let’s say you want to track button clicks. Use Google Tag Manager. It’s a free tool from Google that works with GA4. Start with this beginner guide or follow this full setup tutorial.
Tip: Don’t try to track everything at once. Start simple. Add more later as you learn.
Step 7: Set Up Conversions (Goals)
Conversions help you track what matters most, like a purchase or contact form submission. In GA4, every conversion starts as an event. Once you track the event, you can mark it as a conversion. Here’s how:
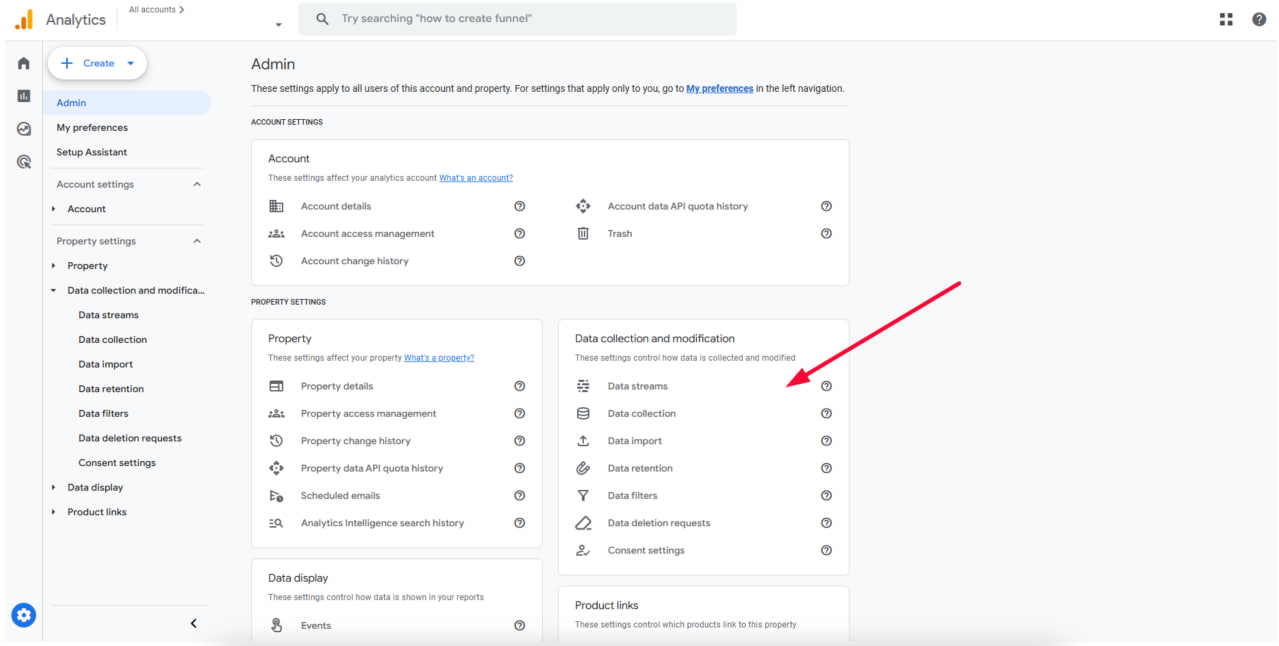
- Go to Admin > Events.
- You’ll see a list of events GA4 is already tracking.
- Next to the one you want to count as a conversion, switch on “Mark as conversion.”
If the event you want isn’t listed, you’ll need to create it first (using Tag Manager or custom code). Only mark real goals as conversions—like “thank you” pages, sign-ups, or sales.


Step 8: Link Google Ads (If You Run Ads)
If you use Google Ads, you should connect it to GA4.
- Go to Admin > Product Links > Google Ads Links.
- Choose your Google Ads account.
- Follow the steps to link it.
Once linked, you’ll be able to see how ads lead to visits, clicks, and sales. GA4 and Google Ads together give a fuller picture of what users do before and after clicking your ads.

Step 9: Create Custom Reports
GA4 doesn’t show everything up front. But you can build your own reports.
- Go to Explore in the left-hand menu.
- Click “Blank” or try a template like “Funnel Exploration” or “Path Exploration.”
You can drag and drop things like:
- User location
- Device used
- Source (where they came from)
- Events (what they did)
It takes some playing around, but you’ll get the hang of it. Watch a tutorial here. Start with simple reports. Save ones you like, so you don’t have to rebuild them every time.

Google Analytics setup might feel different if you’ve used the old version. But once you follow the steps and get used to the layout, it becomes a handy tool. Start slow. Don’t try to track every click on day one. Make sure the basics are working first—like traffic, events, and conversions. Over time, you’ll learn more about what visitors do and what works best. And the good news is, GA4 keeps getting better.
How to Install Google Analytics: A Simple Guide for Beginners
So, you want to track how people use your website? That’s where Google Analytics comes in. It shows you how many visitors you get, what pages they like, where they came from, and what they click on. But before it can do that, you have to set it up.
There are a few ways щт how to set up Google Analytics. It depends on what kind of website you have. Don't worry—this guide breaks everything down in a way that’s easy to follow. You don’t need to be a tech expert.
Step 1: Create a Google Analytics Account:
- First, go to https://analytics.google.com.
- Click “Start measuring.” Sign in with your Google account. If you don’t have one, create one here.
- Give your account a name (you can just use your website name).
- Pick your time zone and currency. Then click “Next.”
- Now it’s time to create a Google Analytics 4 property—this is what collects your website info.
- Name it, choose your country and time zone again, and hit “Create.”
- Accept the terms, and you’re in.
Step 2: Add a Data Stream
A data stream is just a source of traffic—like a website or app. You’ll probably choose Web. Now, add your website’s URL and name the stream (like “Main Site”). Click Create stream. You’ll now see your Measurement ID. It looks like this: G-XXXXXXX. Keep this ID nearby. You’ll use it to connect your site to Google Analytics.
Ways You Can Install It
There’s more than one way to add Google Analytics to your website. The method you choose depends on the platform you use and how much control you have over your site’s code.
Method 1: Using Google Tag
This is the most common method. Works on basic HTML websites and most platforms. Here’s how:
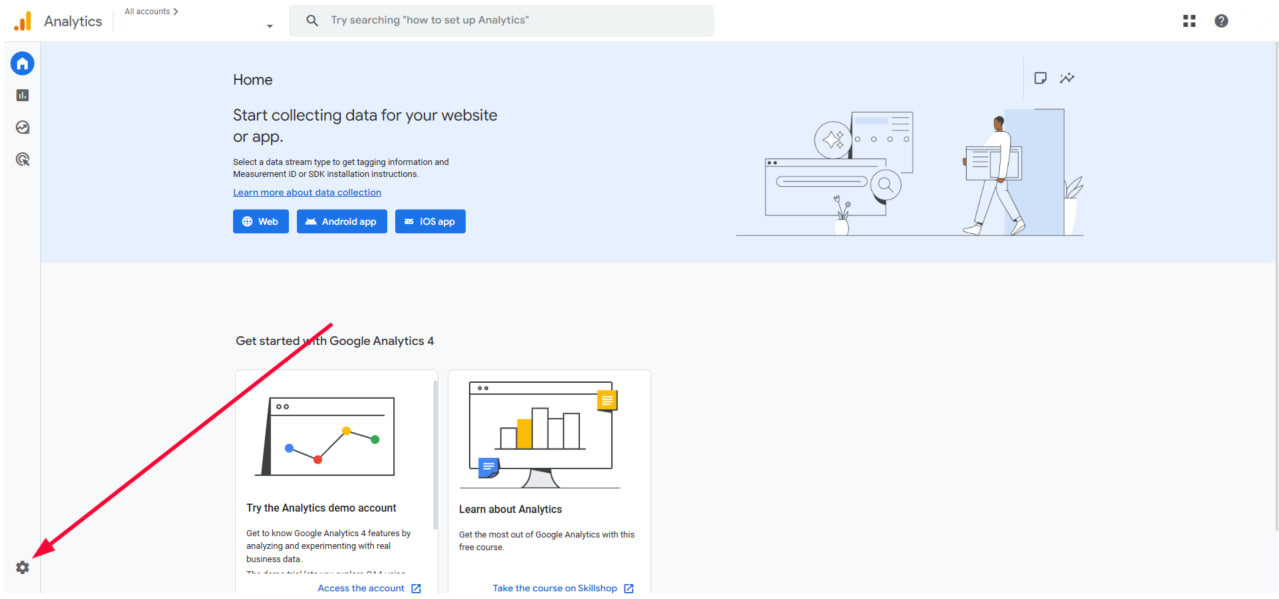
- Go to https://analytics.google.com and open your Google Analytics 4 property.
- Click the gear icon in the bottom-left corner to go to Admin.
- Under the “Property” column, click “Data Streams.”
- Click on your Web stream (the one that has your website URL).
- Scroll down to the section called “Tagging Instructions.”
- Under it, click “View tag instructions.”
- Then click the “Install manually” tab.
Now, paste this code into every page of your website before the </head> tag. If you’re not sure where the <head> section is, search your HTML file for it or ask your developer.

Life Hack: Paste it into a header file if your site has one. That way, it loads on every page automatically.
Method 2: Using Google Tag Manager (GTM)
Google Tag Manager is a free tool that helps you manage all your website tags in one place. It’s perfect if you plan to add more tracking later, like Facebook Pixel or custom events. Step-by-step:
- Go to https://tagmanager.google.com
- Set up an account and a container (this is where your tags live).
- Add your website URL.
- You’ll get two code snippets. Paste one in the <head> and one in the <body> of your site.
- Now go back to your GTM dashboard.
- Click Add a new tag → Choose GA4 Configuration.
- Paste your Measurement ID (from Step 2).
- Set the trigger to All Pages.
- Save and publish.
Tip: Use GTM if you want more flexibility in the future. It’s cleaner and easier to manage.
")
Method 3: Using WordPress Plugin (No Code Needed)
If you use WordPress, installing Google Analytics is easy with a plugin. The easiest way is with Site Kit by Google. It’s free. Here’s how to do it:
- Go to your WordPress dashboard.
- Click Plugins > Add New.
- Search “Site Kit by Google.”
- Install and activate the plugin.
- Follow the setup steps. It will ask for your Google account and connect to your Google Analytics 4 property.
Done! Site Kit adds the GA code for you. No copying and pasting needed. Site Kit also shows your web traffic sources right in the WordPress dashboard. That saves you time checking reports.
")
Method 4: Using Shopify
Shopify doesn’t support GA4 directly, but there’s a workaround. You can use Google’s Google Channel app:
- Install the Google Channel app.
- Link your Google account.
- Set up a Google Analytics account if you haven’t already.
- Follow the setup instructions inside the app.
Or, use a third-party tutorial like this one if you want to add the GA4 tag manually. If you're unsure, ask your Shopify developer to help. A small mistake in your theme file can break your site.
Method 5: Using Wix or Squarespace
Both Wix and Squarespace let you add code easily through their dashboards.
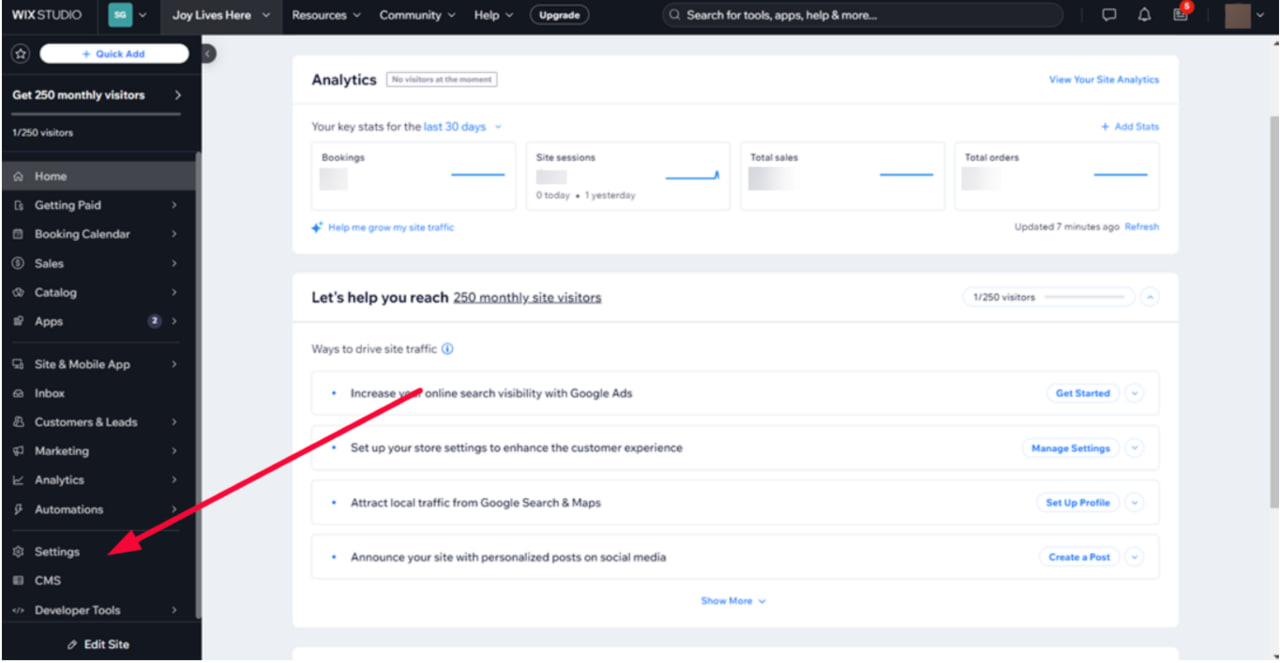
For Wix:
- Go to your Dashboard.
- Click Settings > Custom Code.
- Paste your GA4 script in the head section.
- Apply it to all pages.
For Squarespace:
- Go to Settings.
- Click Advanced > Code Injection.
- Paste the GA4 code in the Header box.

Tip: Always hit “Save” after pasting code. Then open your site in a new window to test if it works.
How to Know If It’s Working
After you’ve installed the code:
- Go back to https://analytics.google.com
- Click your property name.
- Go to Reports > Realtime.
Now open your website in another tab or on your phone. You should see 1 active user. That’s you. If not:
- Double-check that the code is in the right place.
- Make sure you copied the whole script.
- Wait a few minutes. Sometimes there’s a delay.
Bonus Tip: Use Google Tag Assistant to check if the GA tag is firing correctly.
Google Analytics 4 implementation sounds tricky, but once you do it once, it gets easier. Pick the method that fits your website type. If you use WordPress, plugins are the way to go. For custom sites, manual code or Tag Manager works best.
Contents
1. How to Set Up Google Analytics 4 the Right Way – Even If You’re a Beginner
2. Step 1: Create a Google Analytics Account (If You Don’t Have One)
3. Step 2: Set Up a Property for GA4
4. Step 3: Add a Data Stream (Your Website or App)
5. Step 4: Add the GA4 Code to Your Website
6. Step 5: Test If It’s Working
7. Step 6: Set Up Events
8. Step 7: Set Up Conversions (Goals)
9. Step 8: Link Google Ads (If You Run Ads)
10. Step 9: Create Custom Reports
11. How to Install Google Analytics: A Simple Guide for Beginners
12. Ways You Can Install It
13. How to Know If It’s Working
Back to the top
The answers to your questions
What is an engaged session in GA4?
An engaged session is when someone stays on your site for at least 10 seconds, views two or more pages, or completes a conversion. GA4 counts this as a quality visit. It shows that the person didn’t just open your page and leave right away.
What is referral traffic in GA4?
Referral traffic is when someone lands on your website after clicking a link from another site. GA4 tracks where they came from and shows the source. This helps you see which websites send visitors your way.
How to use GA4?
To use GA4, first create a property and connect it to your website with a tracking tag. Once set up, you can view reports about who visits your site, what pages they look at, and how they behave. Over time, this helps you understand what’s working and what needs fixing.
What is a session in GA4?
A session is a group of actions a user takes on your site within a certain time. It starts when they visit and ends after 30 minutes of no activity. GA4 tracks sessions to help you see how long people stay and what they do.
